Granny Square Brick Doorstop – A tutorial of sorts

It has been an absolute crochet frenzy around these parts, as there seems to be many little people in need of amigurumi gifts.
My little person though, was in need of a doorstop for her bedroom. She’s started rolling around the floor like a seasoned commando and likes to play peek-a-boo behind the door. I however, do not wish to play peek-a-boo with the amputated tops of tiny fingers so I made a solution.

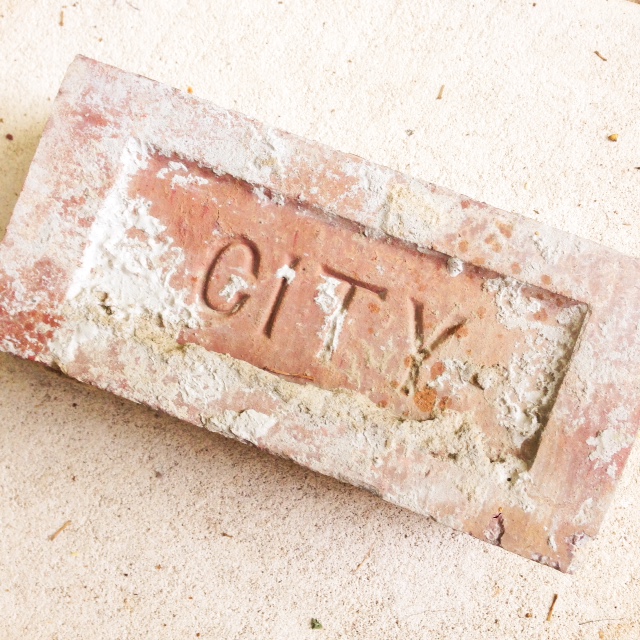
IMG_1212First, I got my husband to procure me a brick from a vacant block near our house. I’m happy to do my own theiving but I forgot and he was taking the dog for a walk.
I gave the brick a clean with the hose and a brush and got all the mud and other detritus off it – only the best for my kid, obviously.
IMG_1204
It was pretty smashed on one corner and I’m a bit worried about the bambina knocking her noggin on every jutting edge in our house so I thought it best to wrap the brick in some poly fibre (the same stuff I stuff my handmade toys with). I tied it on neatly with some hot pink yarn as you can see in the pic below…
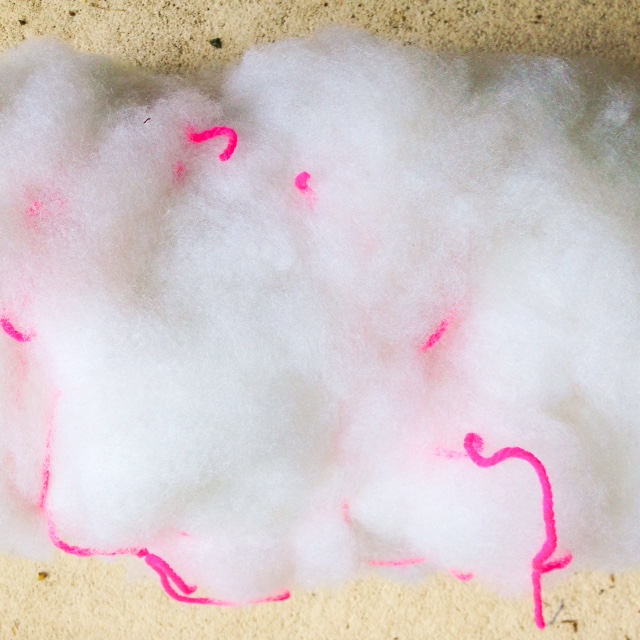
IMG_1205Clearly the stuffing was going in every direction so, as with most projects I make up as I go along, I thought about giving up. I slept on it instead and the solution came to me in  a blinding flash of inspiration after the 4am feed.
I don’t know why (considering I am under the age of 65) I had an unopened packet of opaque black stocking socks in my drawer and frankly I don’t think it’s for you to judge or guess. But one of those nylon babies did the trick, and tightly secured the poly fibre around the brick. I then stuffed some extra filling into each corner to make it double-y soft and safe.

IMG_1206

I chose my colour palette like a wanker pro and got cracking on my granny squares.
I used 8ply acrylic yarn and a 4mm hook and began by making squares of three rounds. I like to sew in my ends as I go, as I find it soul destroying to have to do this when so close to the end of a project because I’m awfully impatient.
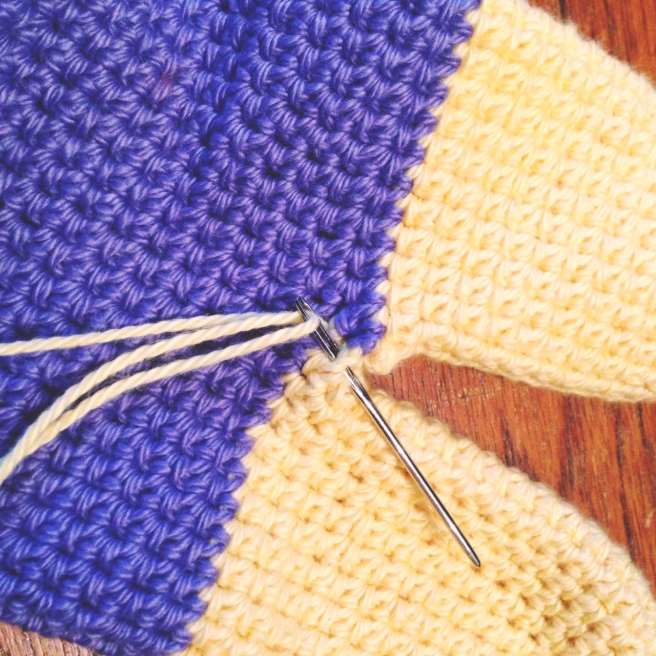
I had decided at the beginning I was going to try a “join-as-you-go” method on this project and used this tutorial. I am a really visual learner so the pics were a great help for me. There’s loads of tutorials out there so go forth and waste your entire arvo on Pinterest finding one that you like.
Join-as-you-go meant the final squares were made up of four rounds.

IMG_1208

I ended up making 12 granny squares and I found the project worked up really quickly joining as I went. I positioned 6 squares along the top of the brick and then folded down each side so there were 3 squares running down the longer edges.
I was kind of bored by this stage so I decided to ditch the idea of covering the brick entirely in crochet – after all the bottom sits on the floor and was already covered and padded. I crocheted 4 black squares to finish off the cover – two for each shorter edge. I used the same joining method but just stretched the squares around to make corners. The cover ended up like the lid of a shoebox so I just popped it over the top of the brick.

IMG_1213To finish the cover off, and secure it underneath, I did two rows of chain stitch from one narrow side to the other and slipped stitched them between two granny squares. I’ll just cut them and redo them when I have to wash it or perhaps after the first wash replace them with some elastic…

I’m sure this tutorial (I use the term very loosely) is as clear as mud, so hopefully the pictures will help.
Of course, you could make a doorstop without the padding and way less squares if you have no tiny craniums to worry about and don’t value your little toe should it get stubbed on a brick…

If you are making one and get stuck please don’t hesitate to email me at fulltiltnanna@gmail.com or leave a comment below, and I’ll do my best to help you through it.

I am happy to take orders and post out covers sans bricks or with bricks if you’re mad enough to pay that kind of postage.
I would also LOVE TO SEE YOURS so send a pic or tag @fulltiltnanna on Instagram if you make one. I am happy to share my crochet patterns (again I use this term loosely) but please do credit me if you use it.

x

Faked It, Still Made It

IMG_0331-0

IMG_0332
Phew! Did you make it? All the way through the silly season in one piece? I did. Just. It was our baby’s first Christmas so our family were beside themselves with excitement and there is a lot of them so we had to spread our visits out over a week.

I decided to start a tradition for me and my bub – I am going to make her a toy each year. I chipped away at this little bunny for around 4 days and got him finished on Christmas Eve, just in time for gifting. I found the amigurumi pattern here

IMG_0334-0

IMG_0335

IMG_0333
Mine looks a little different from the original for a few reasons. The face is all sewn on with no parts that can come off as my baby is very little and bits of felt or beads or “safety” eyes are a choking hazard.
The shape is different because I used the WRONG STITCH. The ears are floppy because I used the WRONG STITCH. I know I used the wrong stitch because on Boxing Day I started a new amigurumi project and without thinking too much about it started busting out the single crochet required and realised it was totally different to the one I was using on the bunny! In fact, I don’t even know what stitch I WAS using on the bunny and am pretty sure I MADE IT UP. I am also pretty sure the bunny is INSIDE OUT.

You see I am a self-taught hooker of the crochet kind and I have relied on the interwebs thus far to provide me with the info needed to grow my skills and repertoire. I always have to refer back to the Googles to remind myself the difference between US and UK crochet terms (even more so now that my memory and a fair amount of my intellect seem to have escaped out of my foof along with the baby) and this is how my error occurred.

IMG_0337
A few years ago something like this would have made me wild with feelings of failure and time wasted and would probably have prompted me to give up crochet altogether. These days though, I am not only proud of my efforts but nothing has given me as much joy as seeing the delight on my daughter’s face when I handed the rabbit to her and she grabbed a purple ear with her chubby fingers and stuffed it straight in her mouth. A wild SUCCESS!
x

P.S. we named the bunny Frank after Frank Costanza creator of The Festivus.

.

Little Christmas Stars

IMG_0068

IMG_9990

FullSizeRender
Craft dream realised – my handmade hanging beside Alice Oehr’s!

I don’t like using wrapping paper cause you know, TREES. This may be construed as being a bah-humbug-surprise-ruiner and that is fair enough. I hand over gifts, you immediately see what you’ve been given and thus have no moment of anticipation or time to compose your poker face in cases of disappointment.

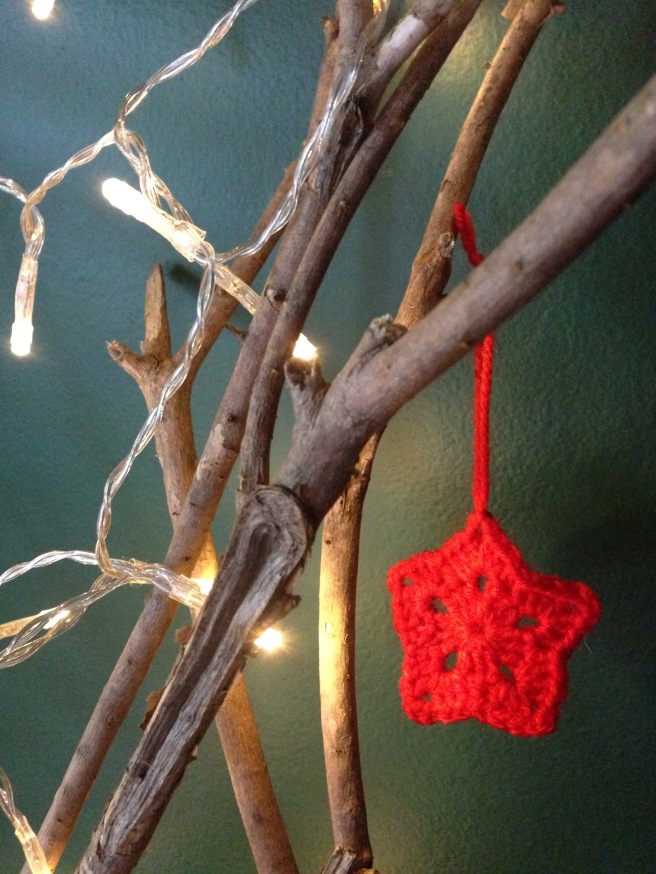
This year I have decided to add handmade ornaments to my “wrapping”. These simple crochet stars are quick and easy to make – perfect for beginner hookers – so if you’d like to have a crack the pattern is via Jelly Wares. (Note: for the ones pictured I stopped at round two because I like the smaller version.)

I can make these decorations in my sleep now as I’ve belted out 120 of them in the past week to raise money for some VERY premmie twins. People’s generosity toward this endeavor has been staggering and over $700 has been donated to this new family to help with their expenses.I sure do know a lot of good eggs.
These tiny little baby girl stars will be in hospital until around their actual due date which is March next year and you can help financially over here if you like.

FullSizeRender(2)Happy gift giving to you and yours x

Let’s Get Ready to Rum Ball

IMG_9818.JPG
IMG_9823.JPGI only really have one silly season tradition and it’s making rum balls.
These little babies are easy, they don’t even constitute “cooking”.
They use up all the jars you’ve been hoarding throughout the year.
They keep well in the fridge so you can make a double or triple batch and be done with it.
They come in handy to avoid the “oh you got me a pressie and I didn’t bother with you” situation that crops up in December. Keep a couple of jars in your handbag until at least Boxing Day to avoid this type of embarrassment…

IMG_9837.JPGIngredients – makes about 50 but do double, trust me

1 pack of plain sweet biscuits
1 tin sweetened condensed milk
1 cup fine desiccated coconut
2 tbs cocoa
1 tbs rum or brandy (this is optional and you may wish to omit if you’ve got kids; or not who am I to tell you how to parent?)
extra coconut for rolling

Before we begin just a note on the biccies. Marie is the traditional biscuit of choice here in Australia however I went with the Arrowroot this year and was not disappointed #justsaying
Crush the biscuits in the food processor or with a rolling pin until they are a very fine crumb. I broke my food processor bowl and don’t have a rolling pin so I smashed mine in a ziplock bag with a 1.25 litre bottle of fizzy water. It took my whole life but it did the job. I was quite cranky with my husband at the time and that seemed to help.
Put all dry ingredients in a big bowl and mix together.
Add the condensed milk and then use your hands to combine all the ingredients. This year I wore food handling gloves which made things quicker and a lot less messy. I’d also highly recommend this if you have tiny folk as you can just whip the gloves off for urgent care giving instead of washing your hands of the sticky mess which takes ages.
Once your mixture is combined you can use a teaspoon to measure out enough mix for uniform size balls or live dangerously and just pinch bits off and roll into mostly the same sized balls.
Roll each ball in the extra coconut and then pop onto a baking tray.
Once you’re all done put the tray in the fridge to firm up the balls (about 20-30 minutes) and then divide them into your jars or place them all in one giant airtight container. They will keep in the fridge for well over two weeks.

IMG_9916.JPGA couple of fancy variations I’ve come up with are:
Cointreau and orange – swap the rum for Cointreau and add the juice and zest of half a fresh orange
OR
Frangelico and lime – same as above but use the juice and zest of a whole lime (be careful with this one as it’s a nut liqueur)

x

I Wanna (nectarine) Jam it Wid You…

IMG_9578.JPG

IMG_9602.JPG

IMG_9599.JPGThere is no doubt that jam is:
A/ bad for you
B/ delicious

The making of also seems to strike terror into the heart of many a home cook. Words like pectin and setting point get bandied about in some recipes and the lists of utensils often mention copper pots and muslin and candy thermometers.

Bottom line is: jam is fruit and sugar. The first time I made it, I wondered why I waited so long because it was easy. So I encourage you to have a crack if you’ve been thinking about it. Granted it’s a little messy and everything you touch the first time you try it will be sticky, but you’ll be feeling pretty smug and clever afterwards (just like when you’re a teenager and… oh never mind).

Before you get started you will need some jars with tight-fitting metal lids. Give them a good hot soapy wash and rinse them really well. Set the oven to its lowest temperature and put the jars and lids on a baking tray and pop them in the oven. This will dry the jars and keep them sterile while you work. It also helps to seal the jam if you pour it into warm glass.

By picking the first result on The Googles  conducting extensive research I’ve found that basically your fruit to sugar ratio is 2:1 – for example, two cups of chopped fruit needs one cup of sugar. Stone fruits work well and as they are in season where I live they are cheap at the moment. The nectarines I used for this recipe cost $3 and made 2.5 jars of jam.

Ingredients
1kg of nectarines – stones removed and roughly chopped (I left the skins on)
2 cups castor sugar
Juice of 1 lemon
1-2 tsp vanilla paste (optional or you can scrape the seeds from a pod and leave the whole pod in too while it cooks)

Put all ingredients into a heavy based saucepan, stir to combine and bring to a gentle boil. Let it simmer away on a low heat for around 30 minutes. (Mine took about 45 minutes because the baby woke up.)
Skim any froth from the top of the jam and give it a little stir, if it’s looking nice and thick drop a spoon of it onto a plate and put it in the freezer for a minute or two to cool. The jam is ready if you can run your finger through the middle of it and each side stays separate. If it’s not quite there just keep the jam simmering until it’s thick enough to set.

IMG_9596.JPGDecant the jam into your jars and screw the lids on tight. BE CAREFUL when doing this. Hot sugar is like molten lava and burns like bloody hell fire. Also your jars and the METAL lids may be quite hot from being in the oven so check before you pick them up and use a tea towel to handle them if necessary.
Once the jars have cooled wipe any excess jam off the outsides with a hot damp cloth and then label. I store mine in the fridge but that part is up to you.

xIMG_9614.JPG


Making Dips & Observations…

IMG_9431.JPG

During the week I scored a bag of carrots for a $1 so I used some for my bub and some to make the carrot dip I read about via the Lunch Lady (I halved the recipe and it still made plenty).

The Lunch Lady is Kate Berry a woman who I admire because she’s all about being the best mum she can be. I dig that, I want to be the best mum I can be too. She also has red hair and is partial to very red lippy so we are already on the same page.

Kate and her partner Rohan put themselves, and their ideas, out there for all to see and cop an extraordinary amount shit for it. I find internet trolling such a bore. If you come across something on the internet you don’t like, it’s not as if you’ve got the whole rest of the world at your fingertips… oh wait. How about you spend your time looking at stuff you DO like instead of moaning about what you don’t like? And if you’re being mean because you are jealous of someone, how about you pull your finger out and start BEING the person you want to be, instead of hating on the one you wish you were? It feels far nicer to be nice.

If you’d like to check out more about what Kate and Rohan are up to you can head to The Nursery Project. And if you don’t, that’s cool too, you can just get on with your day doing the stuff that makes YOU happy.

x

Waste Not, Want Not and Muffins

IMG_9295.JPG

My husband’s favourite bachelor meal is chili con carne FROM A CAN. Go ahead and judge him, I do. This stuff is a heart attack disguised as a tin of beans. Apart from leaving me appalled, this culinary/coronary crime also always leaves a full punnet of sour cream minus about a tablespoon.
In the past, I am ashamed to say, the punnet would usually end up in the bin; but in our new family circumstance of one income and a lot of time on my hands I do not wish to waste anything that we buy.

Luckily over the weekend I saw this excellent recipe on the Instagram feed of Melbourne Epicure. Cathie is a sensational baker, talented photographer and obviously generous with her time – typing out ingredients and methods for frugal strangers to cook with. This is the perfect way to use up sour cream or yoghurt that may otherwise go off.

IMG_9300.JPG

These are delicious muffins. Moist and light and there’s plenty of them (I ended up with 19). I flogged some off to my mothers’ group, put some in the freezer and ate two too many.

Thank you Cathie x

Howdy Cowdy…

IMG_8701

I know what you’re thinking… “Thank goodness just what the internet needs, another blog about crochet and cookies by another narcissistic new mum”. Well you’re right and you’re welcome!

I’m a little unsure of what is to come. There will be wooly projects for sure, possibly some pictures of my dogs, a recipe here and there and probably a stack of links to video clips and other blogs when I am too busy to come up with original content.

Sounds exciting doesn’t it? I’m VERY excited. This online labour of love has been a long time coming and I’m looking forward to tapping out some words every now and then and sharing bits of my little world with you. Yes, YOU.

x